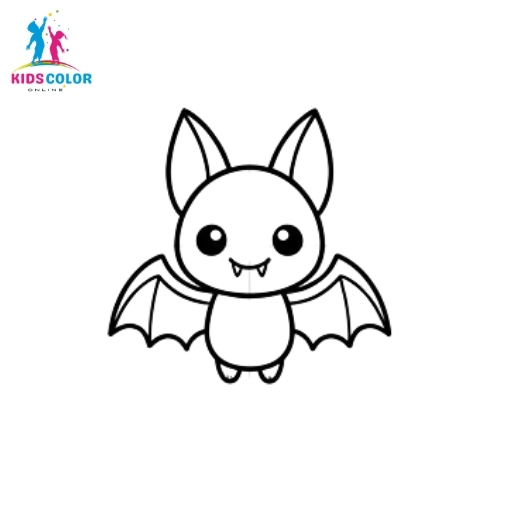
How to Draw a Bat Step by Step
Follow these bat drawing step by step instructions. Go slowly, and remember your bat does not need to be perfect. Every line you draw helps your hand get steadier and more confident.
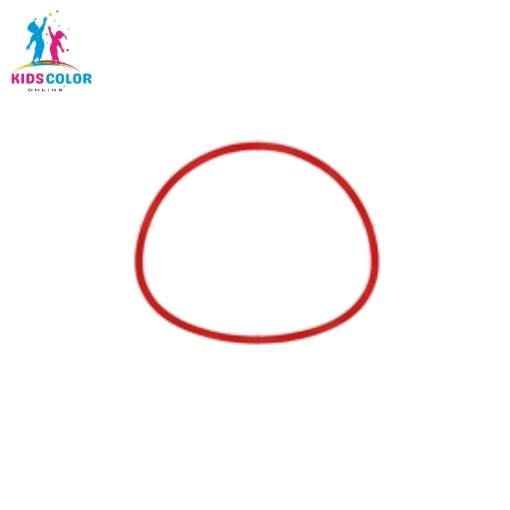
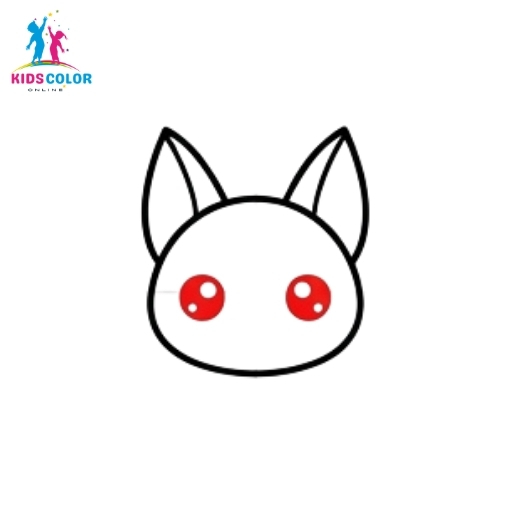
Step 1: Draw the Head
Start by drawing a rounded shape near the top of your paper, a little wider than it is tall. This will be your bat’s head. Draw it lightly so it is easy to fix later.
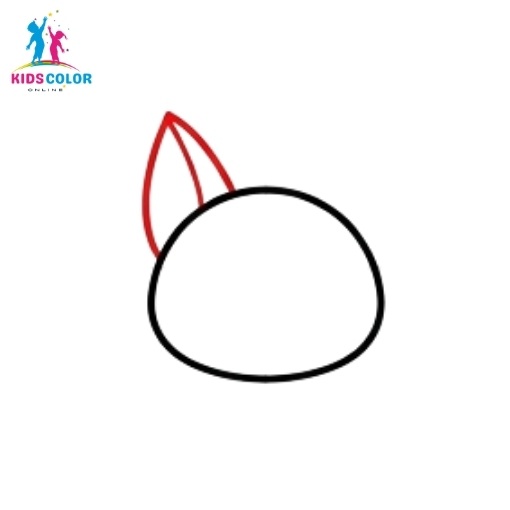
Step 2: Add the First Ear
On the top-left of the head, draw a tall, pointy ear. Bats have big ears, so make it nice and large. It should look a bit like a leaf or a triangle with soft sides.
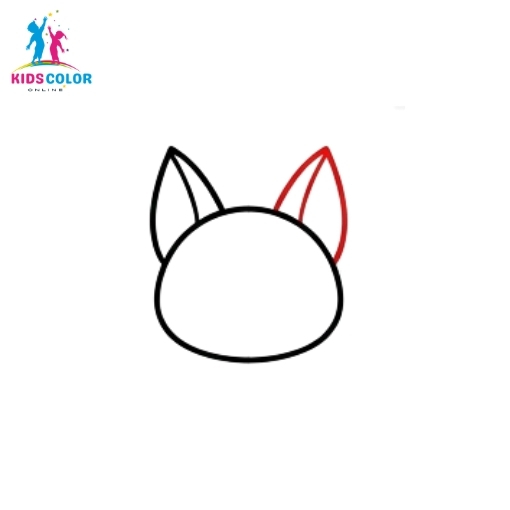
Step 3: Add the Second Ear
Now draw a matching ear on the top-right of the head. Try to make it about the same size as the first ear so your bat looks even. This is called symmetry, and it makes your bat look balanced.
Step 4: Draw the Eyes
In the middle of the face, draw two big round eyes. Big eyes are what make this bat look so cute and friendly.
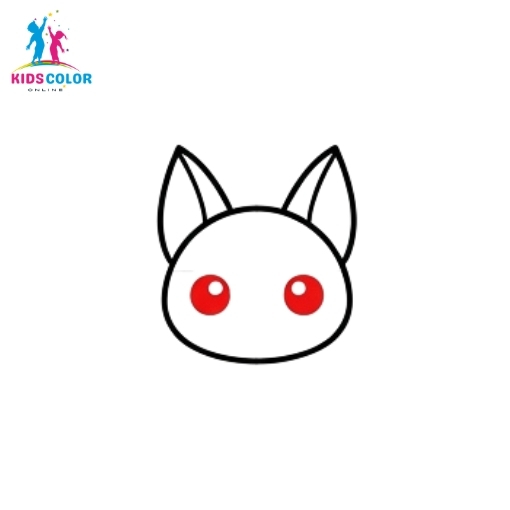
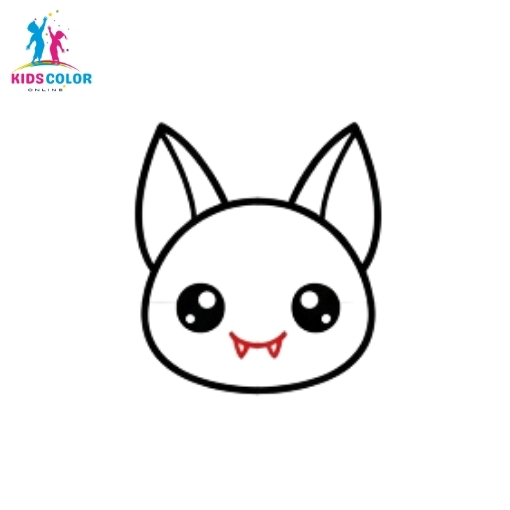
Step 5: Add Shine to the Eyes
Color in the eyes, but leave a small white dot in each one. Those little dots are called highlights, and they make your bat look bright and alive.
Step 6: Draw the Mouth and Fangs
Under the eyes, draw a small, happy mouth. Then add two tiny fangs poking down. Don’t worry, this bat is friendly! The little fangs just give it a fun Halloween look.
Step 7: Draw the Body
Below the head, draw a small rounded body. It can be shaped a bit like an egg. Keep it smaller than the head so your bat stays cute and chubby.
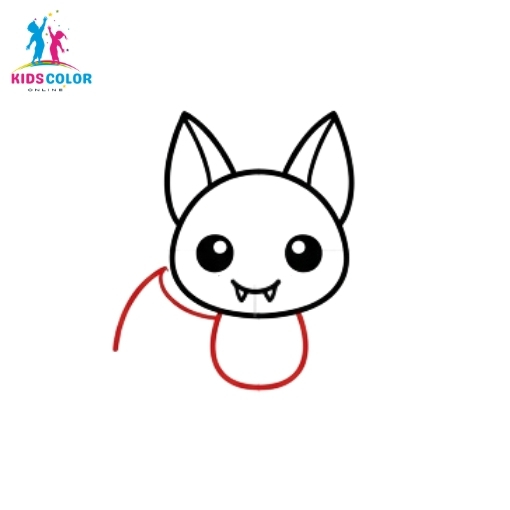
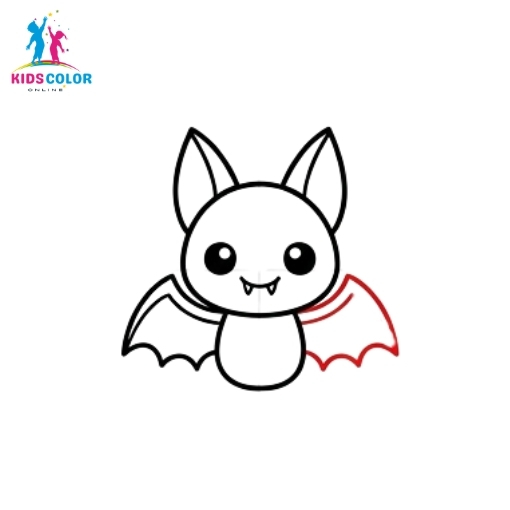
Step 8: Add the First Wing
On the left side of the body, draw a wing. Bat wings have a bumpy, scalloped edge, like a row of soft hills. Start at the body and curve the wing out and around.
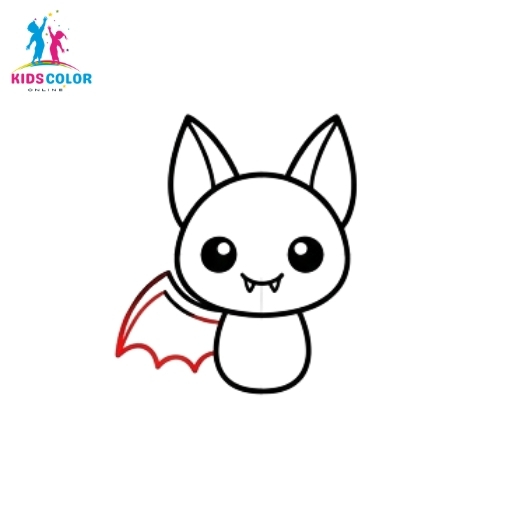
Step 9: Add the Second Wing
Now draw a matching wing on the right side. Try to make both wings about the same size and shape so your bat looks ready to fly.
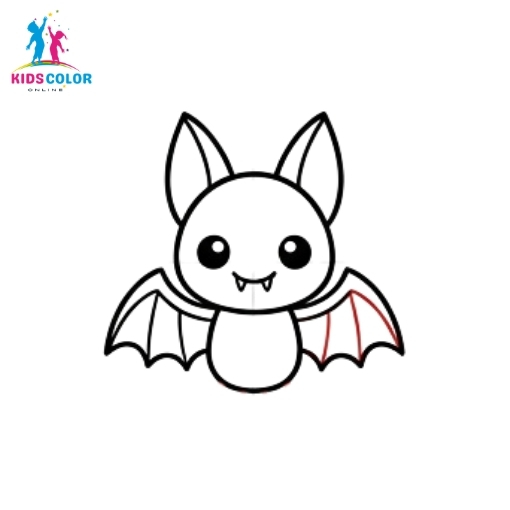
Step 10: Add Lines to the Left Wing
Inside the left wing, draw a few lines that reach out toward each bump on the edge. These lines are the wing “fingers,” and they make the wing look real.
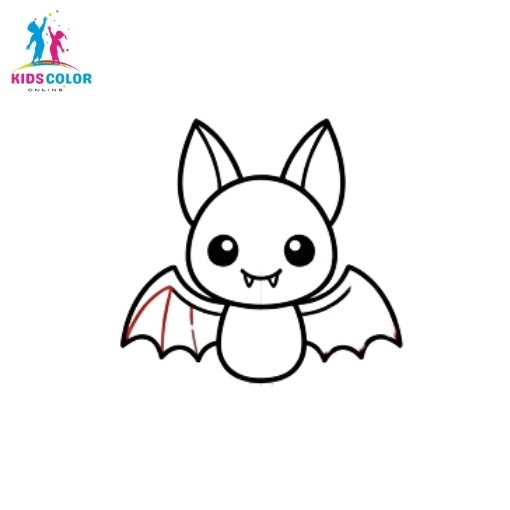
Step 11: Add Lines to the Right Wing
Do the same thing on the right wing. Add a few lines reaching toward the bumps. Now both wings match and look detailed.
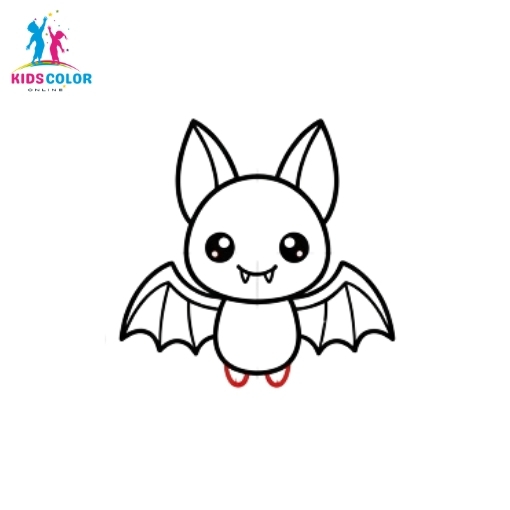
Step 12: Draw the Feet
At the bottom of the body, draw two tiny feet. They can be small rounded shapes. Now your bat is complete and ready for the final touches!
Step 13: Trace Your Final Lines
Go over your favorite lines with a black marker, then gently erase any extra pencil marks. You now have a clean bat outline. This makes a great bat coloring page all on its own!
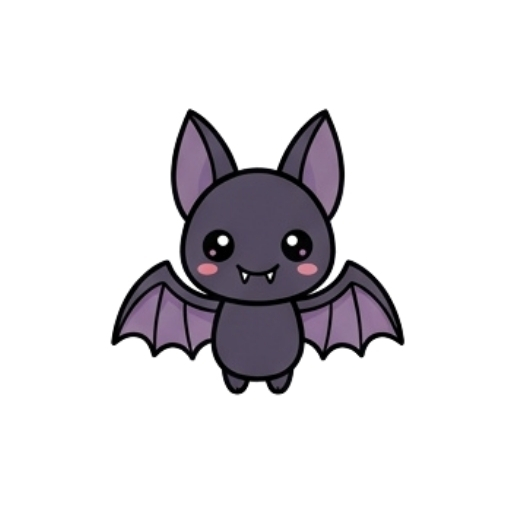
Step 14: Color Your Bat
Now for the fun part: coloring! Most people color bats purple, gray, or black. You can add soft pink cheeks and lighter purple wings to keep your bat looking cute. Of course, it is your art, so use any colors you love!
Fun Facts About Bats
Drawing is even more fun when you learn a little, too. Here are some cool bat facts to share:
- Bats are the only mammals that can truly fly.
- Many bats use sound to “see” in the dark. This is called echolocation.
- A baby bat is called a pup.
- Bats are a popular symbol of Halloween, along with pumpkins and ghosts.