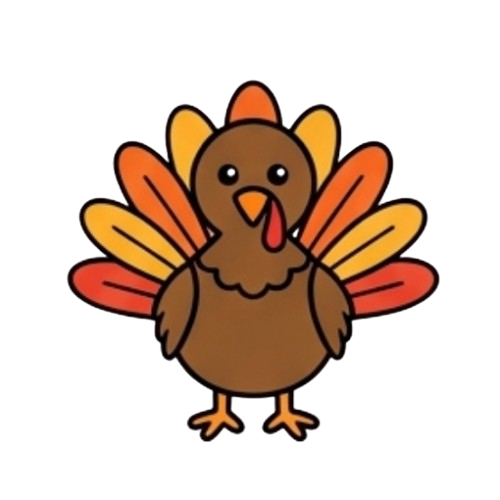
How to Draw a Turkey Step by Step
Follow these turkey drawing step by step instructions. Take your time, and remember that your turkey does not have to be perfect. Each line you draw makes your hand steadier.
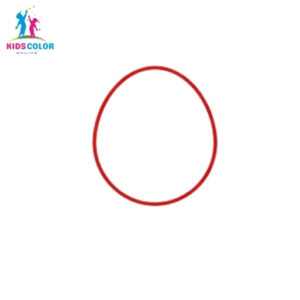
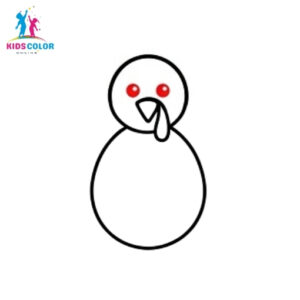
Step 1: Draw the Head
Start by drawing a circle near the top of your paper. This will be your turkey’s head. It does not need to be a perfect circle, so draw it lightly and just have fun.
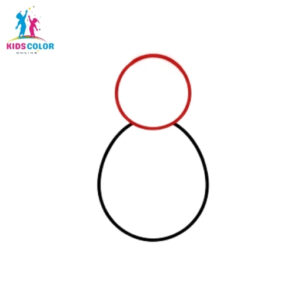
Step 2: Draw the Body
Below the head, draw a big oval shape for the body. Let the top of the oval touch the bottom of the head. Now your turkey looks a little like a snowman!
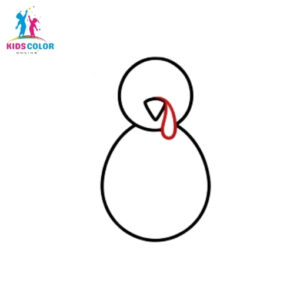
Step 3: Add the Beak
In the middle of the head, draw a small triangle pointing down. This is the turkey’s beak. Keep it tiny and cute.

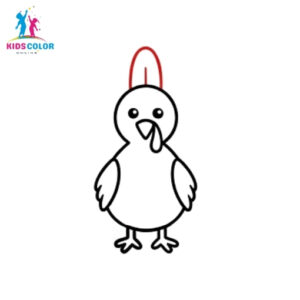
Step 4: Draw the Wattle
Right under the beak, draw a wavy, droopy shape that hangs down. This is called the wattle, the red flap of skin that real turkeys have under their chin. It gives your turkey its silly, friendly look.
Step 5: Add the Eyes
Draw two round eyes above the beak. Color them in, but leave a tiny white dot in each one. That little dot makes your turkey look bright and alive.
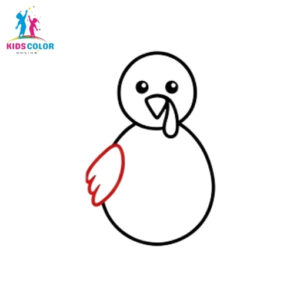
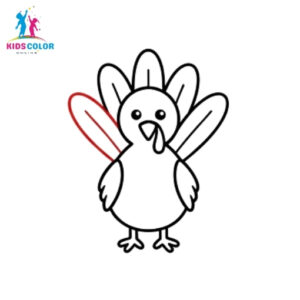
Step 6: Draw the First Wing
On the left side of the body, draw a wing. Make it look like a leaf or a teardrop with a few small bumps at the bottom. These bumps are the feather tips.
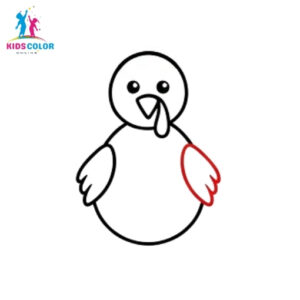
Step 7: Draw the Second Wing
Now draw a matching wing on the right side of the body. Try to make it about the same size as the first wing so your turkey looks even.
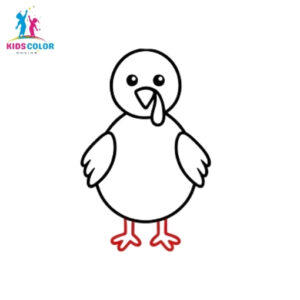
Step 8: Add the Legs and Feet
At the bottom of the body, draw two skinny legs. Add three little toes on each foot. Now your turkey can stand up tall!
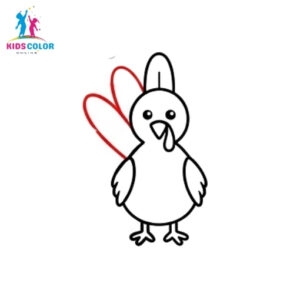
Step 9: Start the Tail Feathers
Behind the head, draw one tall feather shape pointing straight up. This is the center of your turkey’s beautiful tail. Draw a smaller feather shape inside it for a layered look.
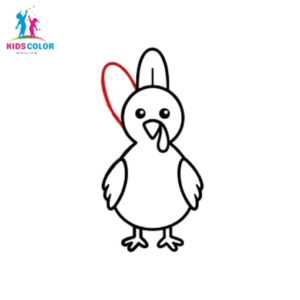
Step 10: Add Feathers on the Left
Add two more feathers on the left side of the center feather. Fan them out a little, like an open hand. Each feather can have a smaller shape inside it.
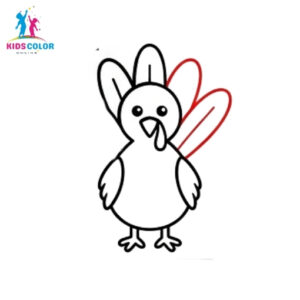
Step 11: Add Feathers on the Right
Now add two feathers on the right side to match the left. Try to keep both sides even so your tail looks balanced and full.
Step 12: Fill In More Feathers
Keep going! Add one more feather on the right side to make the tail look thicker and fancier.
Step 13: Finish the Tail
Add one last feather on the left side so both sides match. Your turkey’s tail is now full and ready to show off.
Step 14: Add the Chest Detail
Draw a small wavy line across the top of the body, just under the wattle. This is the fluffy chest. You can also clean up the outer feathers so they all connect nicely.

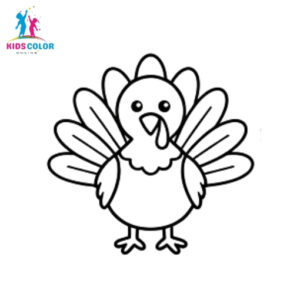
Step 15: Trace Your Final Lines
Go over your favorite lines with a black marker. Then gently erase any extra pencil marks. Now you have a clean turkey outline. This makes a great turkey coloring page all by itself!
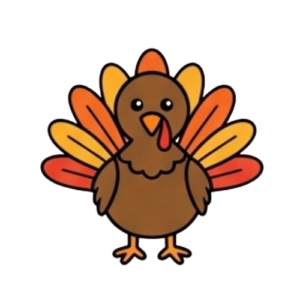
Step 16: Color Your Turkey
Now for the best part: coloring! Color the body brown, the beak yellow or orange, and the wattle red. For the tail feathers, use warm fall colors like orange, yellow, and red. Your turkey is finished, and it looks amazing!
Fun Facts About Turkeys
Drawing is even more fun when you learn a little, too. Here are some cool turkey facts to share:
- The red flap under a turkey’s chin is called a wattle, and the flap over its beak is called a snood.
- Male turkeys are called toms, and they are the ones with the big, fancy tail feathers.
- Turkeys can actually run fast and even fly short distances in the wild.
- The turkey is a popular symbol of Thanksgiving in the United States.